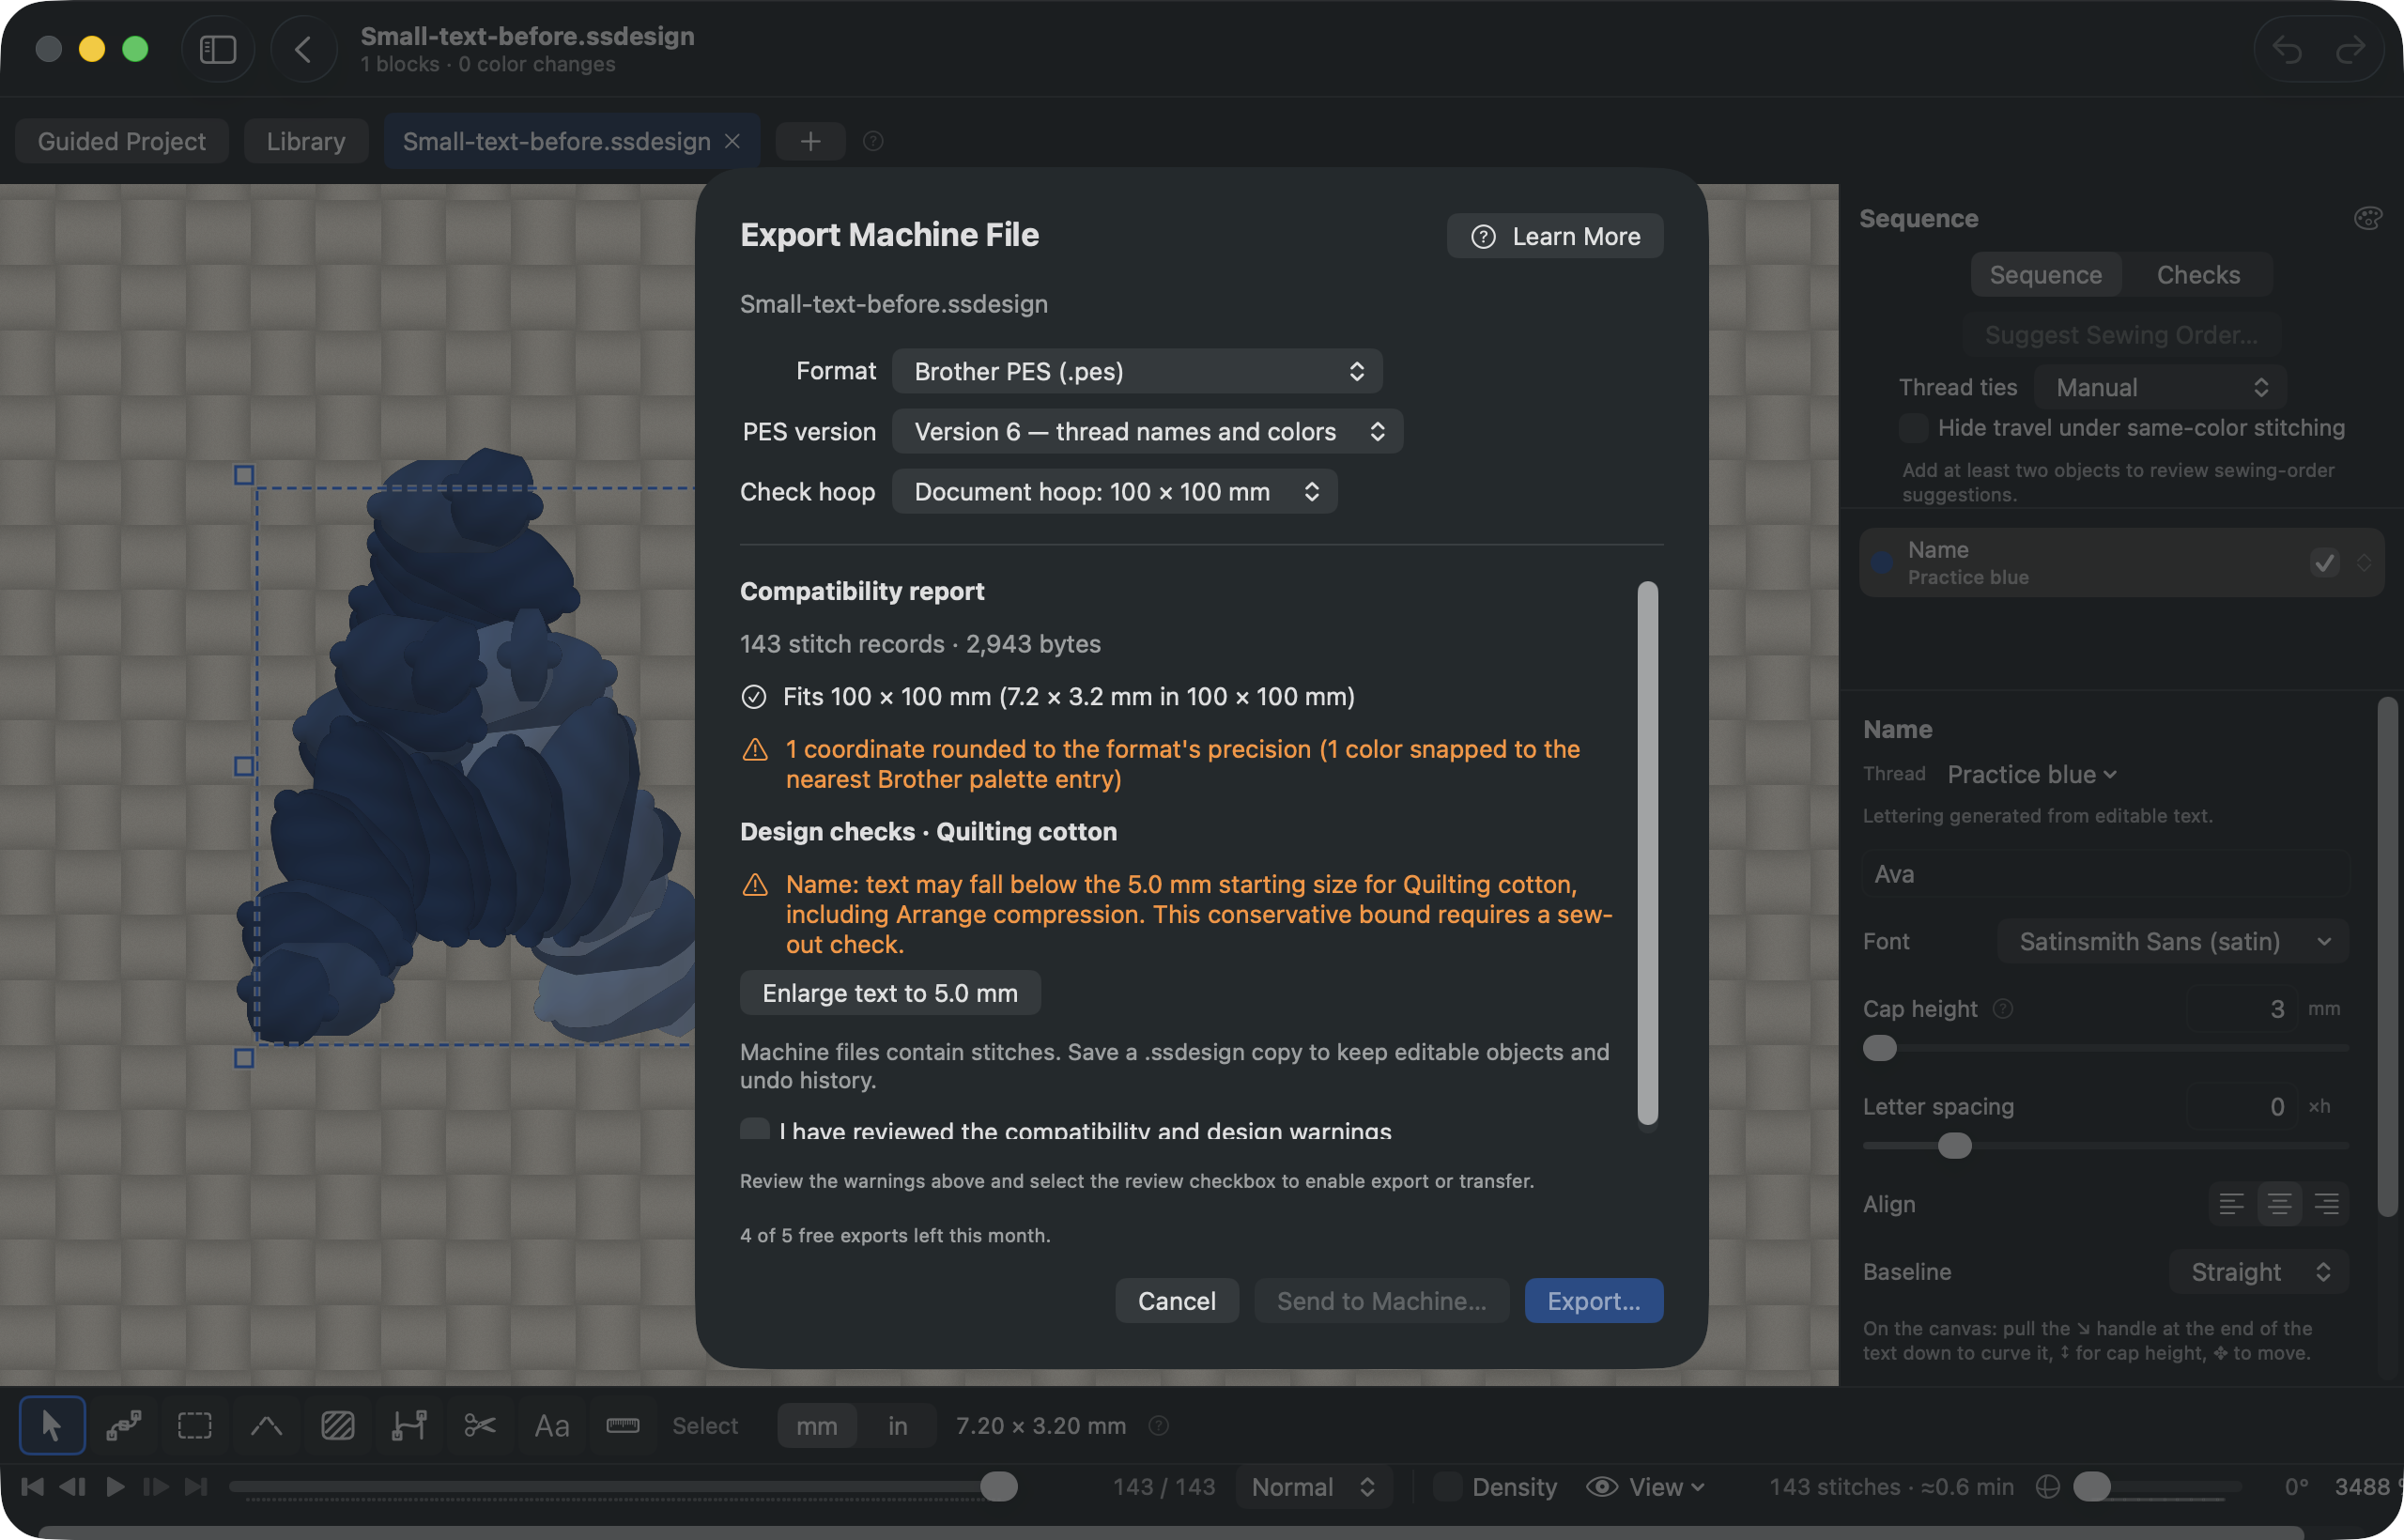
Understand a warning before changing the design
Open the before project
Unzip the files and open Samples/Small-text-before.ssdesign. It deliberately uses Ava at 3 mm. Do not use the before example for production embroidery. Free users can inspect both supplied projects; changing the lettering requires Studio or a suitable evaluation.
Read the design check
Open Export and select PES. Read the small-text warning in the design checks. It compares lettering size against the selected fabric’s provisional starting guidance. Read any other warnings separately; do not assume every warning has the same cause or a one-click fix. Close the report to explore the Density overlay in the canvas, then reopen Export. The overlay helps locate concentrated stitches; it does not replace the written checks or prove sewability.
Compare the corrected reference
Open Small-text-after.ssdesign and inspect its lettering and export checks. The suggested size correction removes the small-text warning. Compare both projects at the same zoom if useful. A larger preview by itself is not evidence that the object’s physical dimensions changed.
Try the correction on a copy
With Studio or a suitable evaluation, reopen the before .ssdesign and save a new copy. In its export checks, choose Enlarge text to 5.0 mm for the supplied Quilting cotton preset. Review the regenerated lettering and confirm that the small-text warning is gone. Undo remains available if you want to compare the change.
Check hoop and format separately
Choose a hoop appropriate to your intended machine and check that the design fits it. Compare PES and DST compatibility reports: DST does not preserve the selected RGB thread colors. These format and hoop checks answer different questions from the fabric and lettering checks; neither certifies physical results.
Save and reopen the result
Save the corrected .ssdesign. If you export, reopen your own machine file and compare size, name, stitch order and color behavior. Free/evaluation exports are limited to five successful exports per calendar month; purchased tiers are unlimited. Without remaining allowance, use the supplied references and keep the editable copy.
What to look for
Small-text-before uses Ava at 3 mm and triggers the small-text check. Small-text-after applies the engine’s suggested text-size correction for the default fabric. That specific warning clears; other warnings may remain. A warning-free preview would still not prove sewability.
A preview helps you understand the file. It does not prove how thread will sew on fabric. These samples have not been physically sewn.
If something looks wrong
A warning remains after the fix
Check its type and message. The exercise addresses small lettering; it does not promise to remove short-stitch or travel warnings. Reassess each warning separately.
The correction is locked
Inspect the included after project for free, or use Studio or a valid evaluation to edit your own copy. Do not confuse free inspection with unrestricted correction.
The size guidance changes
The suggested starting size depends on the fabric preset and lettering geometry. Keep the supplied default preset for this comparison. Recommendations are provisional until an appropriate physical sew-out.
Video companion
Recorded in Satinsmith 1.0.0 (build 9). The narration is a synthetic American English voice. Captions are included, and the video plays from this site without contacting a third party. Download the video (13 MB).
Read the transcript
This lettering looks large on screen, but its cap height is only three millimetres. Satinsmith flags that against the selected fabric’s starting guidance. In this lesson we’ll understand the warning, compare a corrected project, and see why a size check is different from format compatibility. Both examples are linked below. They are educational files, and the before example deliberately contains a problem. Open Small-text-before.ssdesign and open Export. Under Design checks, read the small-text message. For the supplied Quilting cotton preset, the suggested starting height is five millimetres. This is provisional guidance, not a guarantee that a particular thread, needle and fabric combination will work. The report also contains format information. Read those messages separately: a color or precision change is a different issue from lettering size. Open the after project and compare its settings. The small-text warning has cleared because the suggested correction increased the lettering size. Other designs can still have separate travel or short-stitch warnings. You can explore the Density overlay to locate concentrated stitching, but a heatmap does not replace the written checks. Zooming out changes the view; changing the physical lettering height regenerates the embroidery. With Studio or a suitable evaluation, save a copy of the before project and choose Enlarge text to five millimetres in its export checks. Inspect the updated lettering and confirm that the small-text warning is gone. You can undo the change to compare it. If you are using Free access, inspect the included after project instead. Free inspection does not unlock every correction. Choose a hoop appropriate to the intended machine and confirm the design fits it. Compare the format report for PES and DST. DST does not preserve the selected RGB thread colors. A format can store stitches successfully while the design still needs work for the fabric. If you export, open your own machine file and compare the name, dimensions, stitch order and colors. Keep the .ssdesign project for future changes. Evaluations retain the Free allowance of five successful exports per month; paid tiers have unlimited exports. Start with the exact warning, make a change you understand, and check the result. Even a report without warnings would not certify a physical sew-out. The files and written lesson are below, including PES and DST references that Windows learners can inspect in compatible software. The editable projects and this walkthrough require Satinsmith on a supported Mac. Return to the lesson index whenever you want to practice the library, lettering or SVG workflows again.
Learning on Windows
The PES and DST reference exports can be inspected in compatible Windows software. The .ssdesign projects and the Satinsmith controls in this walkthrough require an Apple-silicon Mac with macOS 14 or later. Exported machine files do not retain editable lettering or vector objects. No Windows app release date is promised.