Make a deliberate mapping from artwork to stitches
Open the original artwork
Unzip the pack. Artwork/Leaf.svg is the original source; Samples/Leaf-imported.ssdesign is the editable reference result. You can inspect the SVG in a browser or vector editor before starting. It contains a closed leaf and an open vein, with no fonts or linked images.
Import into a new design
In Satinsmith, create a new design and drag Leaf.svg onto the canvas to open vector import review. SVG digitizing needs Digitizer or higher, or a valid evaluation covering that tier. Opening the supplied reference is also useful if you are inspecting without a license.
Review the two mappings
In the import review, keep the filled leaf as Fill and the narrow open vein as Run. Check the size and the two source colors before applying. A filled region and an open line have different stitching needs; do not turn every path into a satin column.
Apply and inspect
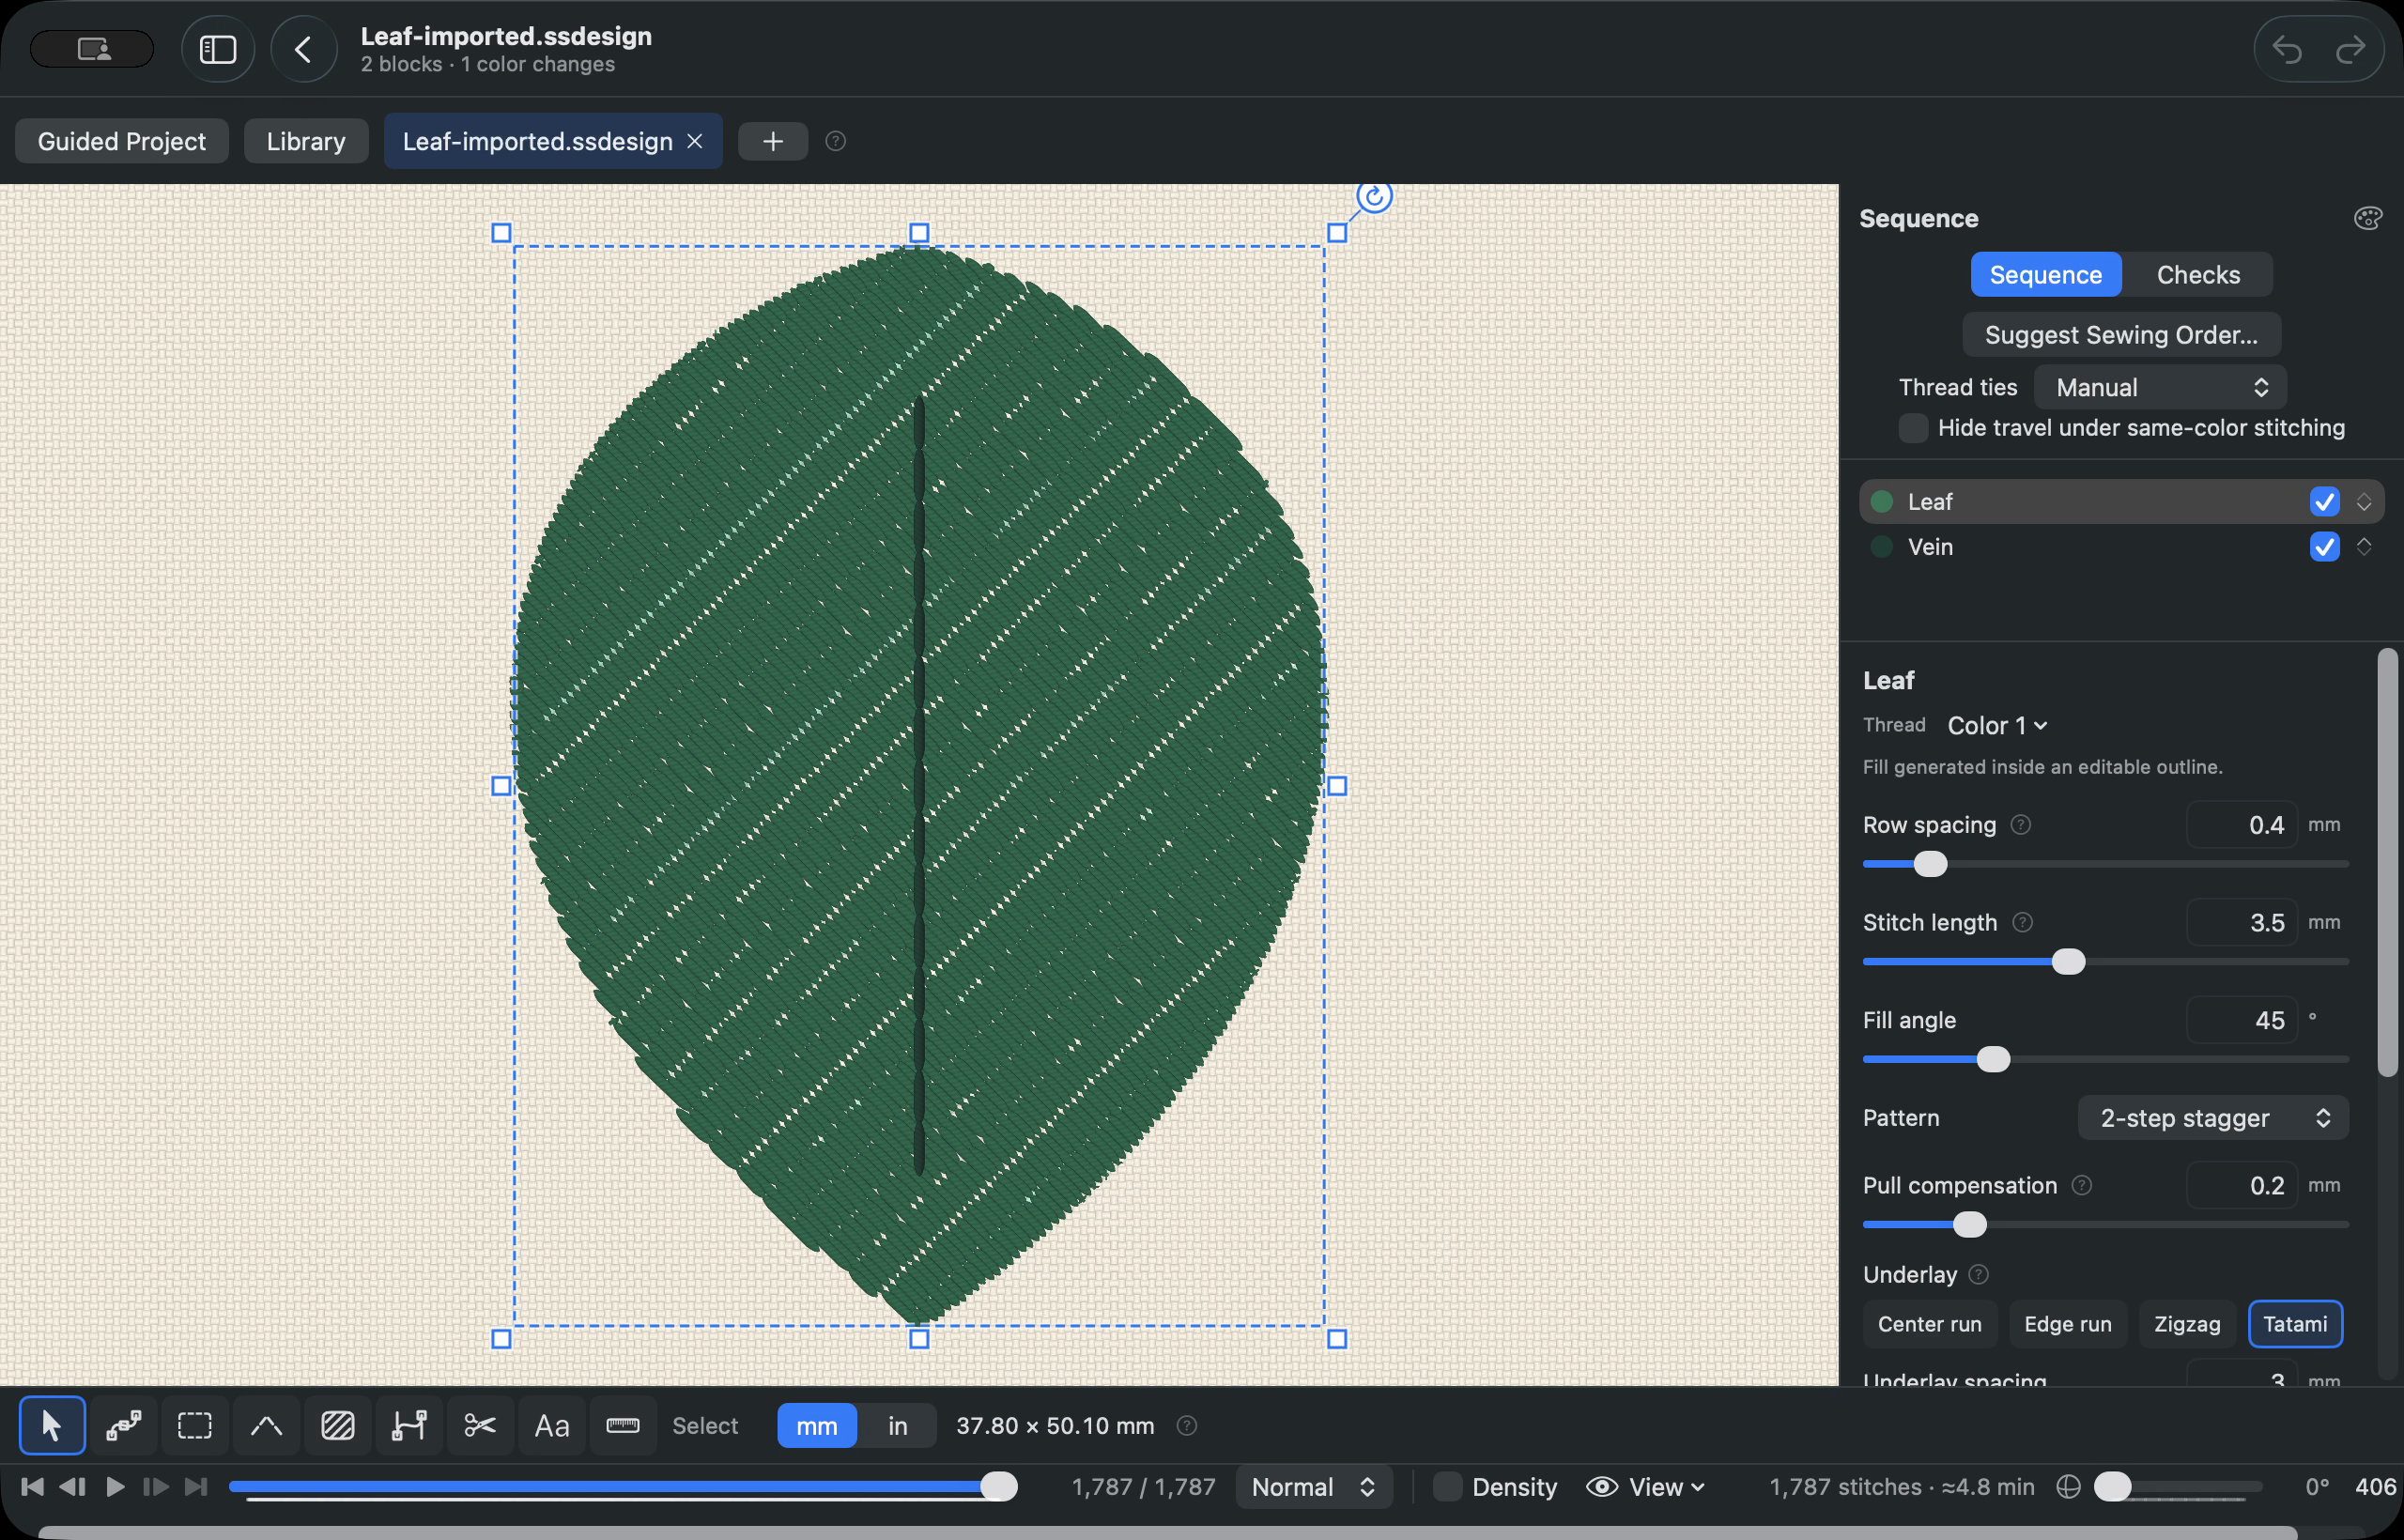
Apply the import, fit the design in the canvas and inspect the Sequence list. You should have a leaf fill and a vein run. Play through them and look at the stitch directions and travel. Compare Leaf-imported.ssdesign, which was made from the same source, default mappings and Quilting cotton fabric settings.
Save the editable result
Save a new .ssdesign copy outside the pack and reopen it. Confirm the two editable objects are still present. Keep Leaf.svg alongside the project so you can return to the artwork. A later fill-angle or spacing experiment should be saved as a separate version.
Review an export
Open Export, choose PES and an appropriate hoop, and read both design checks and format warnings. Export and reopen your own file if you have allowance remaining. Otherwise inspect the supplied PES/DST references. Evaluations retain five exports per month; purchased tiers have unlimited exports. Software checks do not establish how the design will sew.
What to look for
The SVG uses a 60 × 60 mm page with one closed green leaf and one narrow dark vein. Map the leaf to Fill and the open vein to Run. The page size is not the sewn size: stitches occupy only the artwork. SVG colors are generic RGB values, not a manufacturer thread match. Revision v2 matches the released app’s Quilting cotton defaults: 0.20 mm pull compensation and 0.30 mm underlay inset. The reference contains 1,787 stitch records; v1 used the engine-only defaults and remains available at its original URL.
A preview helps you understand the file. It does not prove how thread will sew on fabric. These samples have not been physically sewn.
If something looks wrong
Import is unavailable
SVG authoring requires Digitizer or higher. Studio can edit existing objects but does not unlock this import workflow. Use a valid evaluation for the required tier or inspect the reference files.
The line becomes a fill or satin
Review the open vein separately and choose Run. Use the supplied SVG without converting its line to an outlined filled shape.
The dimensions differ from the page size
The 60 mm SVG page includes margins. Compare actual sewn bounds, not the SVG canvas. Do not resize just to force the embroidery to fill the page.
Video companion
Recorded in Satinsmith 1.0.0 (build 9). The narration is a synthetic American English voice. Captions are included, and the video plays from this site without contacting a third party. Download the video (16 MB).
Read the transcript
This leaf starts with just two paths: a closed shape and an open line. We’ll turn the shape into a fill and the line into a run, then keep the result editable. The original SVG, reference project and machine files are linked below. The download is free; this import workflow requires Digitizer or an evaluation covering that tier. Unzip the files and find Leaf.svg in Artwork. There are no fonts or linked images to resolve. The page is sixty millimetres square, but the drawing has margins. The page size is not the sewn size. When we compare the result, we will look at the embroidery’s actual bounds. Create a new design and drag the SVG onto its canvas. In the import review, the green closed leaf maps to Fill, and the thin open vein maps automatically by its width, which makes it a run. These paths serve different purposes. A filled region needs area coverage; the vein only needs a line of stitches. Turning every path into satin would lose that distinction. Check the size and colors, then apply the import. Now the Sequence list has two editable objects. Select the leaf to see its fill settings and select the vein to inspect the run. Play through the result and watch the direction of the fill and the travel into the vein. The supplied reference uses the default mappings. Its source colors are generic RGB choices, not a guarantee of a particular brand’s thread match. Read the design checks rather than judging only the preview. Save a new .ssdesign project and reopen it to confirm the two objects remain editable. Keep the original SVG too. If you later experiment with fill angle or row spacing, save another version so you can compare. To make a machine file, open Export, choose the format and hoop, and review the warnings. Reopen your own export after writing it. The supplied PES and DST files are comparison material, not proof that your export succeeded. The useful decision here is simple: choose the stitch structure for each path. Evaluation users keep the Free five-export monthly allowance; purchased tiers have unlimited exports. Windows learners can inspect the SVG and compatible machine files in their own software, but these Satinsmith controls and projects require a supported Mac. The written steps and files are below. Next, we’ll read export warnings and compare a small-lettering correction.
Learning on Windows
The PES and DST reference exports can be inspected in compatible Windows software. The .ssdesign projects and the Satinsmith controls in this walkthrough require an Apple-silicon Mac with macOS 14 or later. Exported machine files do not retain editable lettering or vector objects. No Windows app release date is promised. Leaf.svg also opens in a compatible vector editor.